Installation Guide for Windows NT
This document is also available for on-line inspection in the folder Installation in your CD-ROM under the name install.html.
Foreword
*Quick Start
*Minimum Requirements
*Installation
*1. Installing Hummingbird X server
*2. Installing the 3D extensions
*3. Setting the Exceed configuration
*3.1 Selecting a three button mouse
*3.2 Selecting the keyboard
*4. Installing DeskArtes
*5. Starting your network
*6. Starting the scheduler to enable EXTrace batch processes
*7. Running DeskArtes 3D Products
*8. Getting a license code for DeskArtes
*9. Installing the license code for DeskArtes
*10. Uninstalling DeskArtes 3D Products and the X Server
*11. Running a SETUP program
*
DeskArtes 3D Products run under Windows NT but they require an X Window System emulator. This is accomplished by using the Exceed X Server from Hummingbird. Before you can install and use DeskArtes 3D Products, you must install the server and the 3D extensions. In addition, you may need to start TCP/IP services as explained in detail in
Starting your network.If this is the first time you are installing DeskArtes 3D Products, you may want to read the entire document sequentially. If you have already installed the Hummingbird software, you may skip to section 4,
Installing DeskArtes.If you are updating your installation, please make sure you close all DeskArtes applications and X Server sessions before you begin.
NOTE!
These installation instructions assume that the device character for the CD-ROM device is "E". If that is not the case in your PC, just replace the "E" with the correct device in the commands that follow. The installation should be done under the user name Administrator.Please read the License Agreement before you install the software.
1. Installing Hummingbird X server
To install the Hummingbird X server (Exceed), run the Exceed
Setup program from the 3DSolutions/WinNT/exceed folder. The Exceed Setup program will guide you through the installation of the X Server using several dialog boxes. Simply follow the instructions and use the defaults that will be suggested, but keep note of the following:2. Installing the 3D extensions
To install the Exceed 3D Extensions, run the Exceed 3D Extensions Setup program from the 3DSolutions/WinNT/3d folder. The Exceed 3D Extensions Setup program will guide you through the installation of the extensions using several dialog boxes. . Simply follow the instructions and use the defaults that will be suggested, but keep note of the following:
3. Setting the Exceed configuration
Run the Xconfig program from the Exceed program group in ![]() menu in the lower left corner.
menu in the lower left corner.
![]()
The following window should appear:

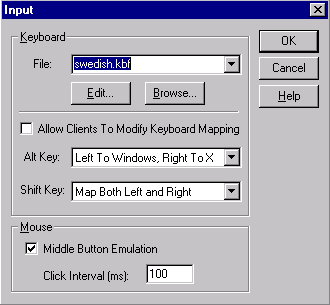
3.1 Selecting a three button mouse
The Exceed configuration is set for a two button mouse. The functions in DeskArtes that use the middle mouse button are evoked by pressing the left and right buttons simultaneously. If you have a two button mouse, proceed to
Section 3.2.For a three button mouse, you should do the following:
To install DeskArtes,
run the Setup from the 3DSolutions/WinNT folder. The Setup program will take you through the installation procedure. At any time you may quit by pressing theEven if your computer is not in a network, DeskArtes needs the TCP/IP network services. Please follow these instructions:

6. Starting the scheduler to enable EXTrace batch processes
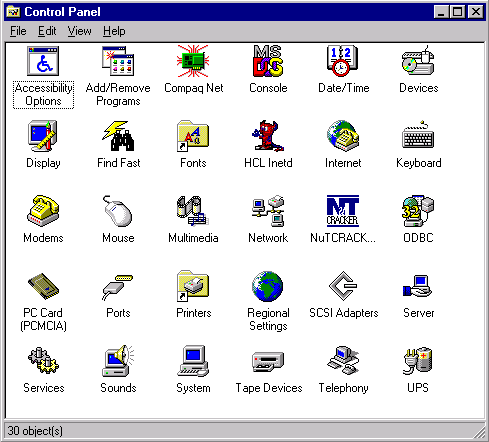
If you will use the Industrial Design System, then you must start the Windows NT Schedule Service if it not already running. If you will use Rapid Tools or RapidCAM, please skip this section.
The Schedule Services are handled from the Control Panel. Proceed as follows:
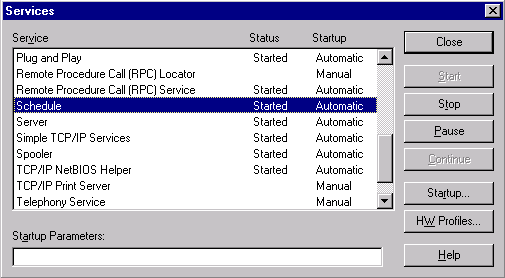
From the list, select the
7. Running DeskArtes 3D Products
8. Getting a license code for DeskArtes
Start the program as explained in the previous section. From the System Menu, select Version Info. A window will be displayed that includes the system ID.
Send the system ID to DeskArtes or your local distributor, and you will get a three-line license code.
9. Installing the license code for DeskArtes
Assuming DeskArtes was installed in
C:\DA, the license must be stored in a file in the directory C:\DA\System under the name dalic.SYSTEMID. For instance, if the system id equals 12345, the file must have the name dalic.12345.Type the license into the file
C:\DA\System\dalic.SYSTEMID by using the Notepad editor as follows:notepad C:\DA\System\dalic.SYSTEMID
where C:\DA is the installation directory for DeskArtes, and
SYSTEMID represents the system id number of your PC. Using the example above, you would then type 12345:
10. Uninstalling DeskArtes 3D Products and the X Server
To uninstall the DeskArtes 3D Products, proceed as follows:
![]()
To uninstall the Hummingbird X Server, select the Uninstall entry in the Exceed Program folder:
![]()
![]()